How to Deploy your first Python (Streamlit) App with Heroku
With Heroku, we can deploy our web apps relatively easily with a few clicks or via Git with a few commands.
In one of my last articles, I showed how you can create a simple data visualization app with Streamlit. To deploy the app, I presented options like Streamlit sharing or cloud platforms such as Heroku or AWS. This article is about what Heroku is, what you can use the Platform-As-A-Service for and how you can deploy a Streamlit app to Heroku in combination with GitHub.
What is Heroku?
Heroku is a cloud platform that allows you to deploy, manage and scale web applications quickly and easily. This means that Heroku takes care of the entire infrastructure while you can focus on writing code for your app. You don’t have to deal with complex technical details such as server configurations or network management.
Put simply, you write your code, push it to Heroku and Heroku makes sure your app is available online.
Heroku has been part of Salesforce since 2010. Heroku supports the programming languages Node.js, Ruby, Python, Java, PHP, Go, Scala and Clojure.
The practical thing about Heroku is how easy it is to use. With just a few clicks, you can link your Heroku account with GitHub and then upload your application to the cloud. The same works with Git. The basic building blocks of Heroku are so-called Dynos. These are virtual containers that run your web applications. If you want to scale your app, you can increase the number of Dynos to provide additional computing power.
What can you use Heroku for and how does it work?
Heroku is particularly suitable for applications that you want to bring to the cloud quickly and easily. Examples of this are prototypes or smaller projects. And of course Heroku offers you the tools and services if you want to host and scale web applications and APIs online.
If you want to run a scalable application, you can add additional dynos as your project grows and you need more computing power or memory. Especially if you want to start small, you can use the Eco Dynos. These Dynos offer a cost-effective way to get started with limited hours. However, these Exo Dynos also require a verified account with a credit card. Unfortunately, there are no longer any free options. Once your project takes off, you can switch to a paid version to add more Dynos and add-ons.
Dynos are isolated, lightweight Linux containers that run your applications. Each Dyno is allocated a certain amount of CPU, memory and network resources that are available to run your application. This container technology allows Heroku to be highly flexible and scalable. When you deploy your applications on Heroku, they run on one or more dynos. These dynos can be scaled horizontally. This means that you can either increase the number of web dynos for traffic or the number of worker dynos for background processes. You can control these settings either via the Heroku dashboard or via the Heroku CLI.
Step-by-step Guide to Deploy a Streamlit App on Heroku
In a previous article, I showed you how to create a simple data visualization app with Streamlit and start it locally with the command ‘streamlit run app.py’. Now I will show you how to deploy this app to the cloud on Heroku. You will need your application files, a GitHub repository and a Heroku account.
1) Create a Heroku Account
The first step is to create an account on Heroku. Here you also need to set up multi-factor authentication, whereby I used the Salesforce Authenticator app. Other options are to use a code or the Google Authenticator app.
2) Optional — Download the Heroku CLI
If you want to deploy your app via Git, you need to install the Heroku CLI. With this CLI, you can manage and deploy your application directly from the terminal. In the Heroku documentation you will find instructions on how to deploy your app with Git.
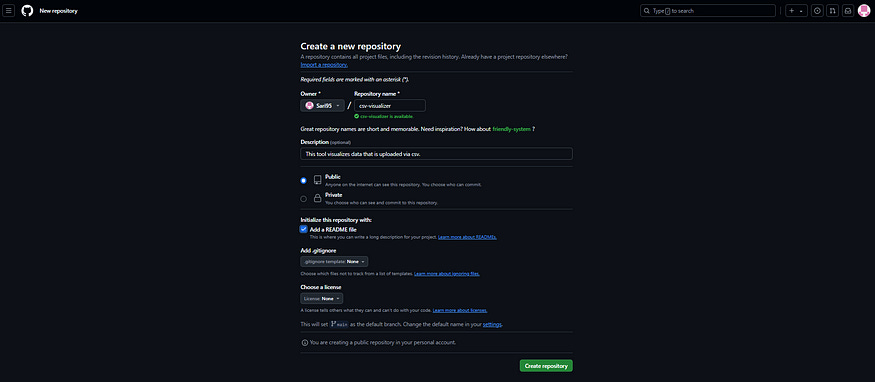
3) Create a GitHub Repository
Next, create a GitHub repository for your project if you don’t already have one.
Then upload at least 3 files:
App.py: This file contains the main code of your Streamlit app. Of course you can name it differently as long as the file has the py extension.
Procfile: This file tells Heroku how to start your app. It is important that you save this file without a file extension. In my app, the content looks like this:
web: streamlit run app.py — server.port=$PORTrequirements.txt: This file lists all Python packages that your app requires. For my Streamlit app, these are only the packages streamlit, pandas and matplotlib.
4) Create a New App and Connect GitHub with Heroku
Once your GitHub repository is ready, you can create a new app on the Heroku platform.
Then link your GitHub account and your GitHub repository to Heroku by selecting the deployment method and authorizing access.
5) Deploy code
Once you have connected your repository to Heroku, you can deploy your code either manually or automatically. In the Heroku dashboard, select the branch you want to deploy (usually main or master). You will then see in real time how Heroku builds and launches your app.
As soon as the code for your app has been successfully deployed, you will receive a message and you can start your app.
And now you have deployed your app on Heroku. You can find the code in the GitHub repository.
Final Thoughts
With Heroku, we can deploy our web apps relatively easily with a few clicks or via Git with a few commands. Heroku is therefore ideal when prototypes need to be created quickly or when projects need to be deployed that are growing and scaling. Alternatives are Railway, Fly.io or Render (often with a better price-performance ratio) for simple solutions or AWS Elastic Beanstalk, the Google Cloud Platform and Microsoft Azure for more complex projects.
References


